Although I’ve sewn a few score items in the past three or four years, not one was a pair of pants – unless I count a pair of overalls with an adjustable length and no waistband. I was worried about sewing something that was either too tight or baggy in the crotch, and I didn’t want to mess around with zippers and buttons. I liked the look of the Margot pants because of the elastic waistband and side leg ties. When I tried to look up reviews for them (in 2020), I found none. In fact, I found one person who said she’d avoided the pattern because of a lack of reviews.
Now that I’ve made these, I can happily say that I’m satisfied with the pattern, which was relatively quick to sew. They are easy to pull on and not too long or short in the crotch. They don’t pull when bending. I can see myself using the pattern again for shorter shorts (shortening the length and omitting the side ties), as well as further pairs of capri and ankle pants.
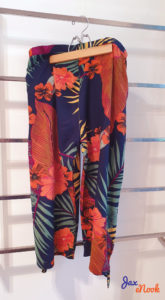
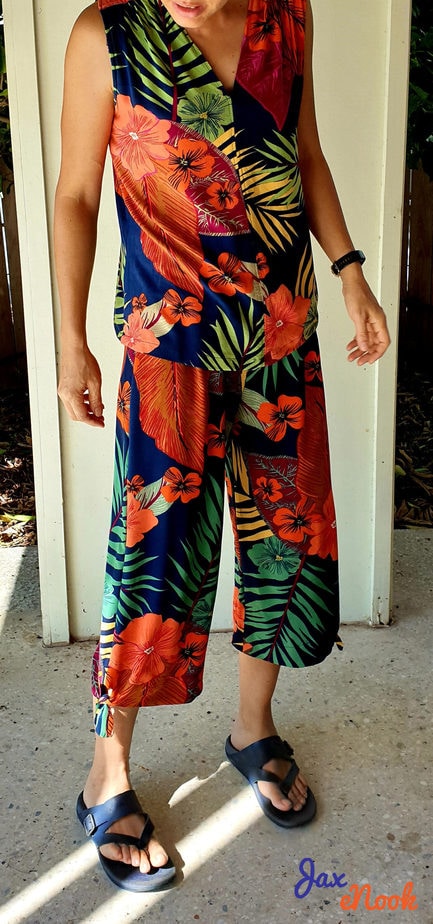
However, I did differ from the pattern in my approach to the waistband, which I will describe further below. Before I do, here are some pics of the final item, paired with a top in the same rayon fabric that I used a few years ago to make a shortened version of the Endless Summer Tunic.


Now that I’ve said this is a worthwhile pattern, it’s time to point out some of its nuances IMO. The first is the lack of pockets. I don’t know why any pattern company wouldn’t include them (in-seam), because they are simple enough. Luckily I feel comfortable adding them without direction – I was just lazy in this instance. If you’re an advanced sewist (which I’m not), I doubt you’d bother with this pattern because you’d already have your own pattern block/sloper. Being a simple pattern, the target market would surely appreciate some pocket advice.
Next, if you are used to having to lengthen patterns (as I am), you may not need to with this one. I was after a 3/4 pair of summer pants so I removed 5 inches. I’m almost 174cm and sewed the size small. As you can see, I think this was spot on and the full version would be grazing my ankles.
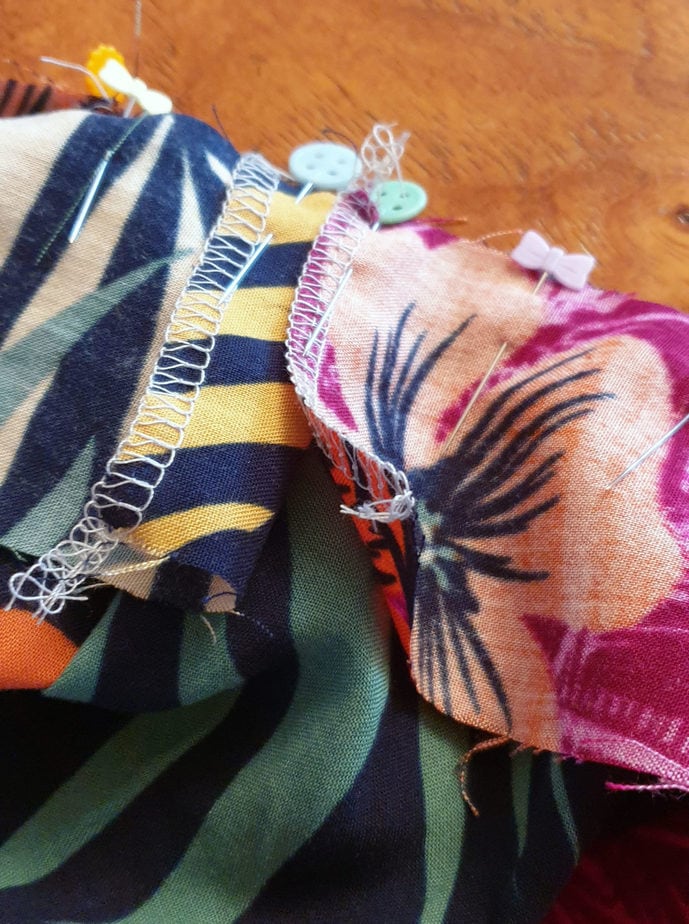
If you have an overlocker, you can speed things up by finishing raw edges with it instead of following the pattern, which asks you to turn-iron-sew the hem facing.
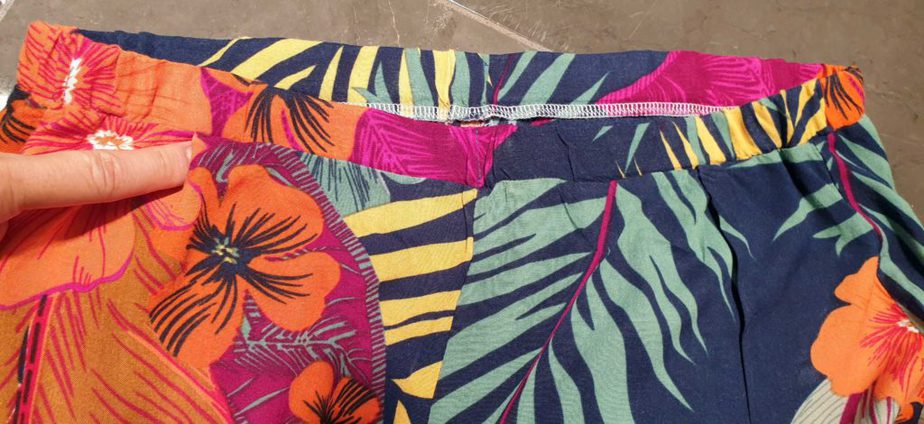
Now to the waistband, which warrants attention. For a start, don’t cut the elastic based on pattern numbers. I needed extra length and it’s easy to test and cut during construction instead of cutting at the outset.
Also, the length (width) of my waistband did not match up with the width (circumference) of the pants. Now, that might be something to do with my different approach to waistband attachment. It didn’t matter because I simply added some front darts to the pants to take up the fabric, as per the photos below. When I make this pattern again one day, I’ll just add an inch or two before cutting out the waistband. It’s not hard to do, and then I can trim back during construction as necessary.
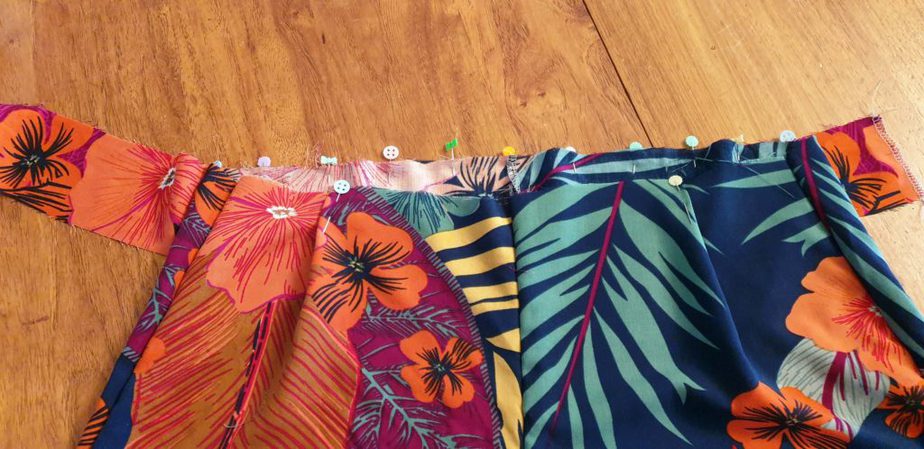
Front dart.
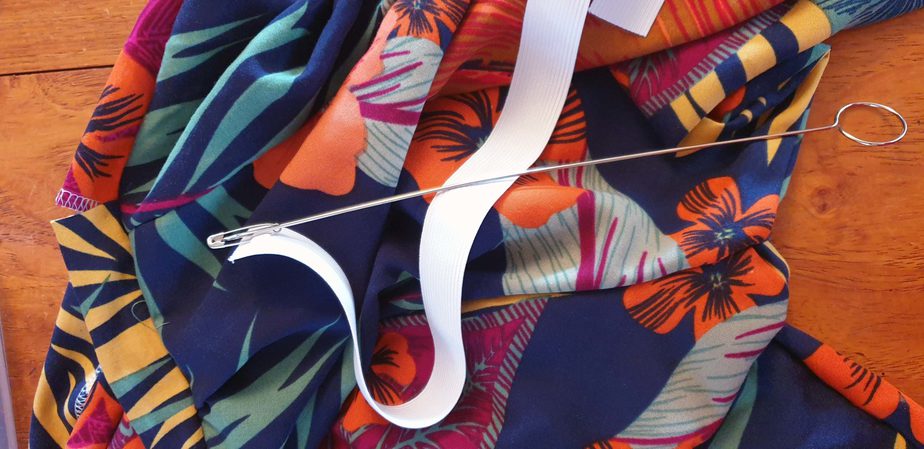
1 of 1The pattern describes a way of attaching both the waistband and elastic at the same time. (You encase the elastic as you sew.) I chose not to do this for a few reasons. One, I wanted to keep an opening at the waistband to adjust length or swap out tired and saggy elastic eventually. Two, I’m not a fan of sewing ‘in the round’, whereby you hope that the measurements of two pieces line up exactly while negotiating curves. I much prefer to sew ‘on the flat’. Three, I think it would be annoying to have to stop and fiddle with the elastic while encasing it (adjusting the pull at different points). I thought it would be much easier to go with the old fashioned method of sewing an encasing with an opening, and then threading the elastic through that.
To do this, I highly recommend the long tool in the last photo below. This sits within the head of a safety pin attached to the elastic. It quickly pushes the elastic through most of the waistband, and then when you withdraw the tool, you only have a short bit further to push the safety pin. Make sure you have secured the other end with a different safety pin so you don’t accidentally pull it through as well!
So there you have it, a review of the Margot pants. I find them very comfortable and relatively quick to sew. They’d be even quicker without the side ties of course. I look forward to making more eventually, since I like it when tops and bottoms are made out of the same material, and that’s not often an option in the fast-fashion world. Perhaps that’s because the industry doesn’t want the hassle of matching stock quantities when one or the other sells out faster.